How To Setup IPTV on Kodi Using PVR Client Step-by-Step
A lot of people, myself included, started their cord-cutting journey using Kodi. I remember back in 2015, I would set up various addons on Kodi to watch movies. The addons were gradually overtaken by time, but Kodi still maintained a place close to my heart.
I eventually switched to using Kodi as a media organizer for my local content, but today we will be looking at how to set up IPTV on Kodi using a PVR client.
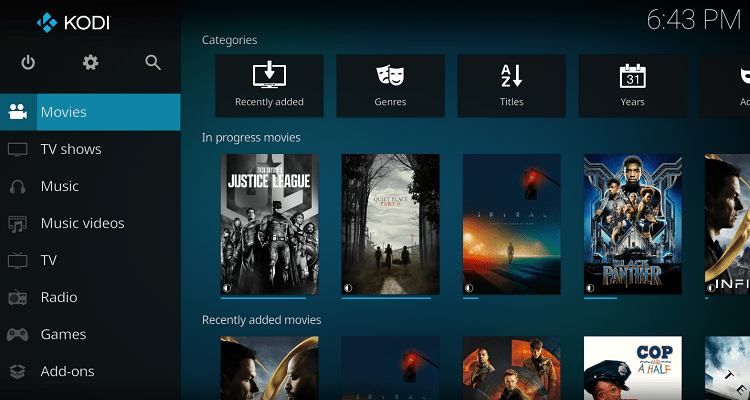
IPTV on Kodi
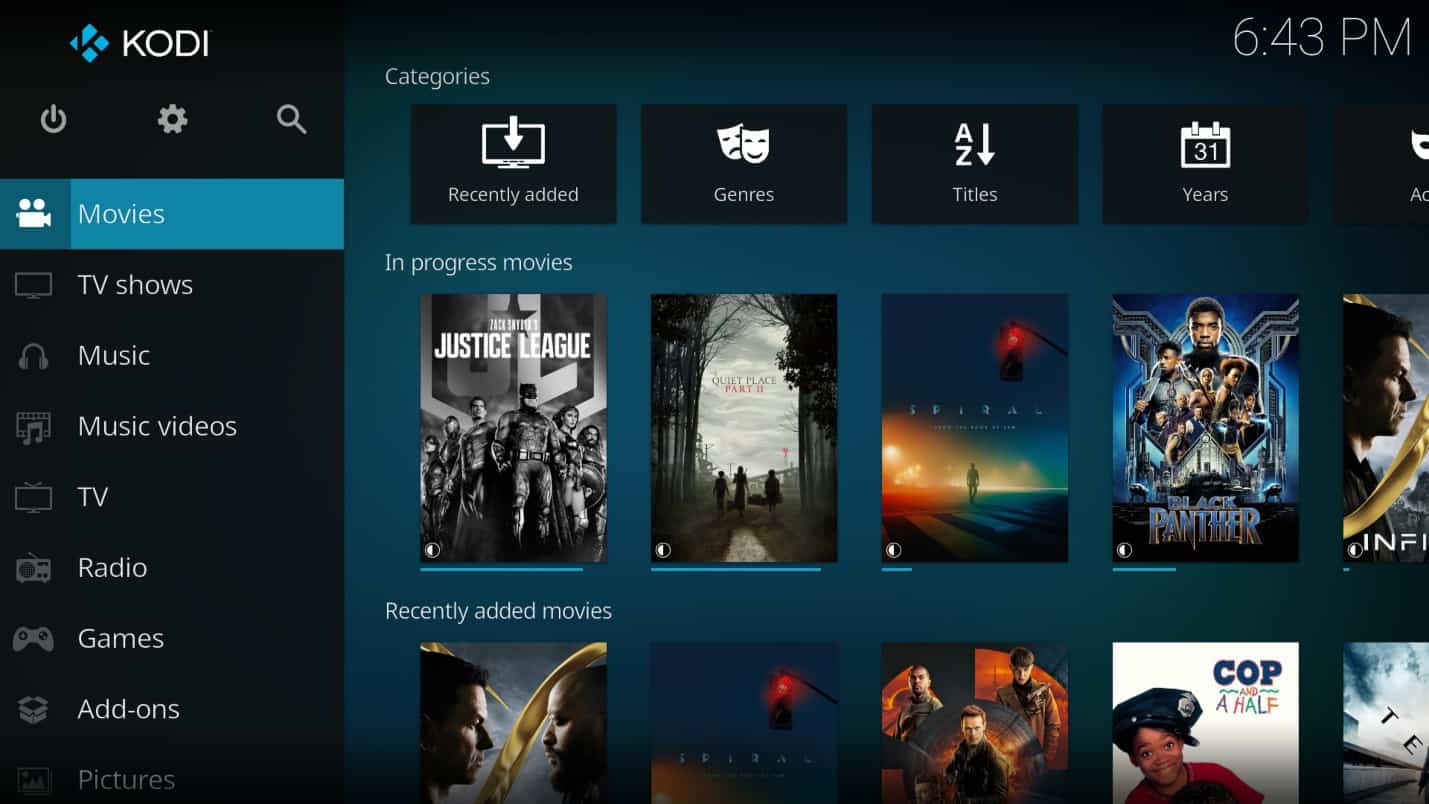
Kodi is a free, open-source media player that is developed by the XBMC Foundation. XBMC stands for Xbox Media Center, a media player designed for the earlier versions of the Xbox gaming console. Kodi is fantastic for organizing and indexing local content from a USB drive or Network-attached storage, but it can also be used for IPTV by using a PVR client.
Read on to find out how to set up IPTV on Kodi.
What you will need for this tutorial
For this tutorial, you will require the following:
Any Android, Windows, iOS, Linux, macOS, tvOS, or FreeBSD platform. (You can see just how versatile Kodi is based on the number of supported platforms).
The most significant selling point of Kodi is the fact that it is open-source. This enables third-party developers to create addons that piggyback on the Kodi platform, and therein lies its true power. Odds are any functionality that you need has already been developed by someone as an addon.
Step by Step Instructions on How To Setup IPTV on Kodi
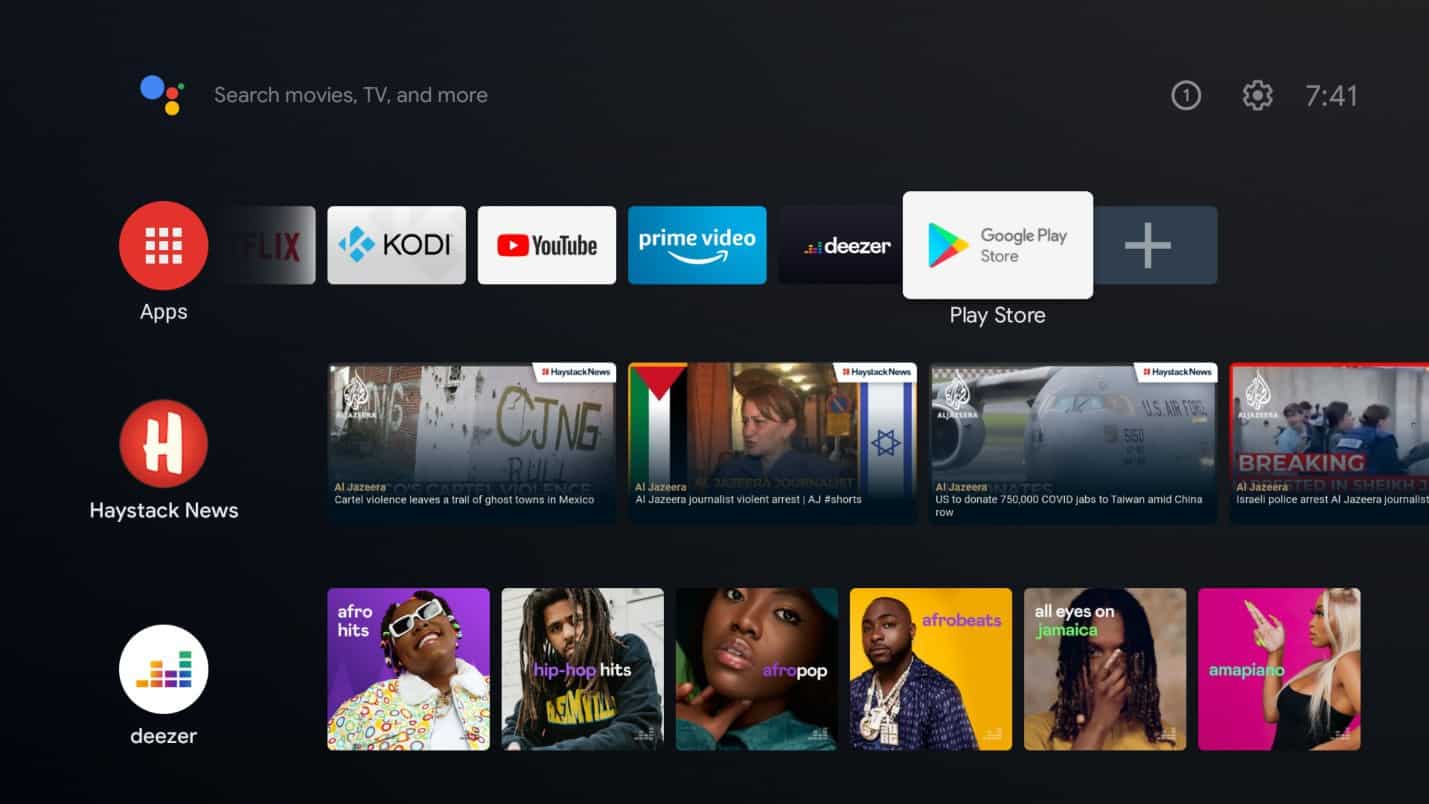
Step 1: From your home screen, go into the play store.
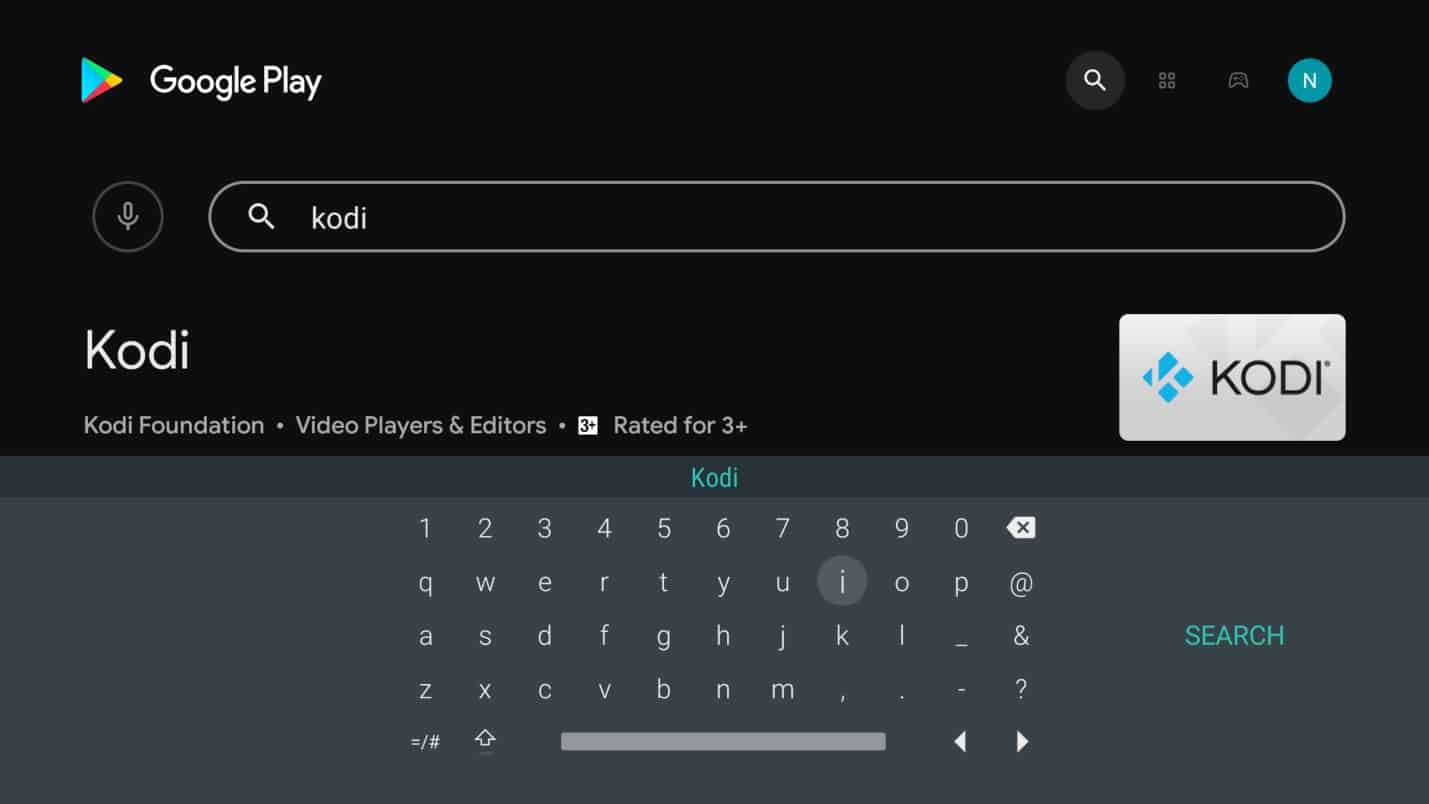
Step 2: Search for “Kodi”
Step 3: Click on the “Install” button.
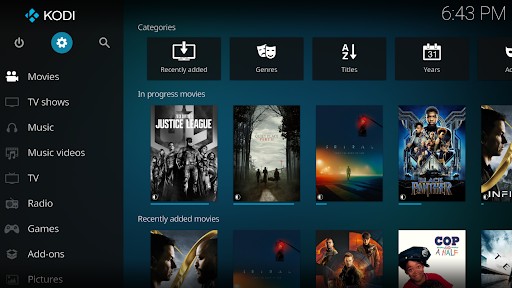
Step 4: Once the installation has been completed, click “open” to launch the app.
How to Configure IPTV on Kodi
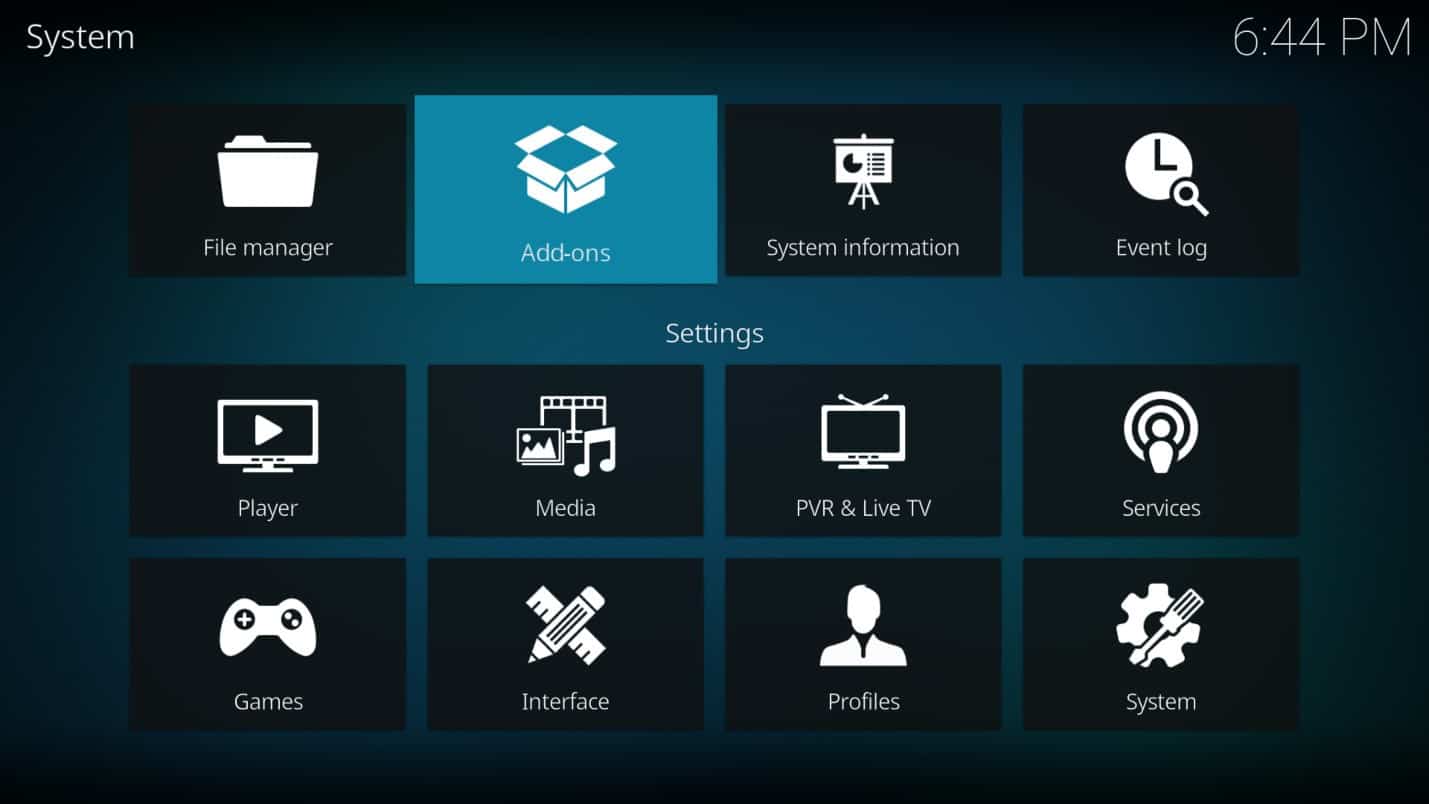
Step 1: Click on the “settings” button at the top left of the screen, it’s the button that resembles a cog.
Step 2: Once on the “Settings” page, click on “Add-ons”.
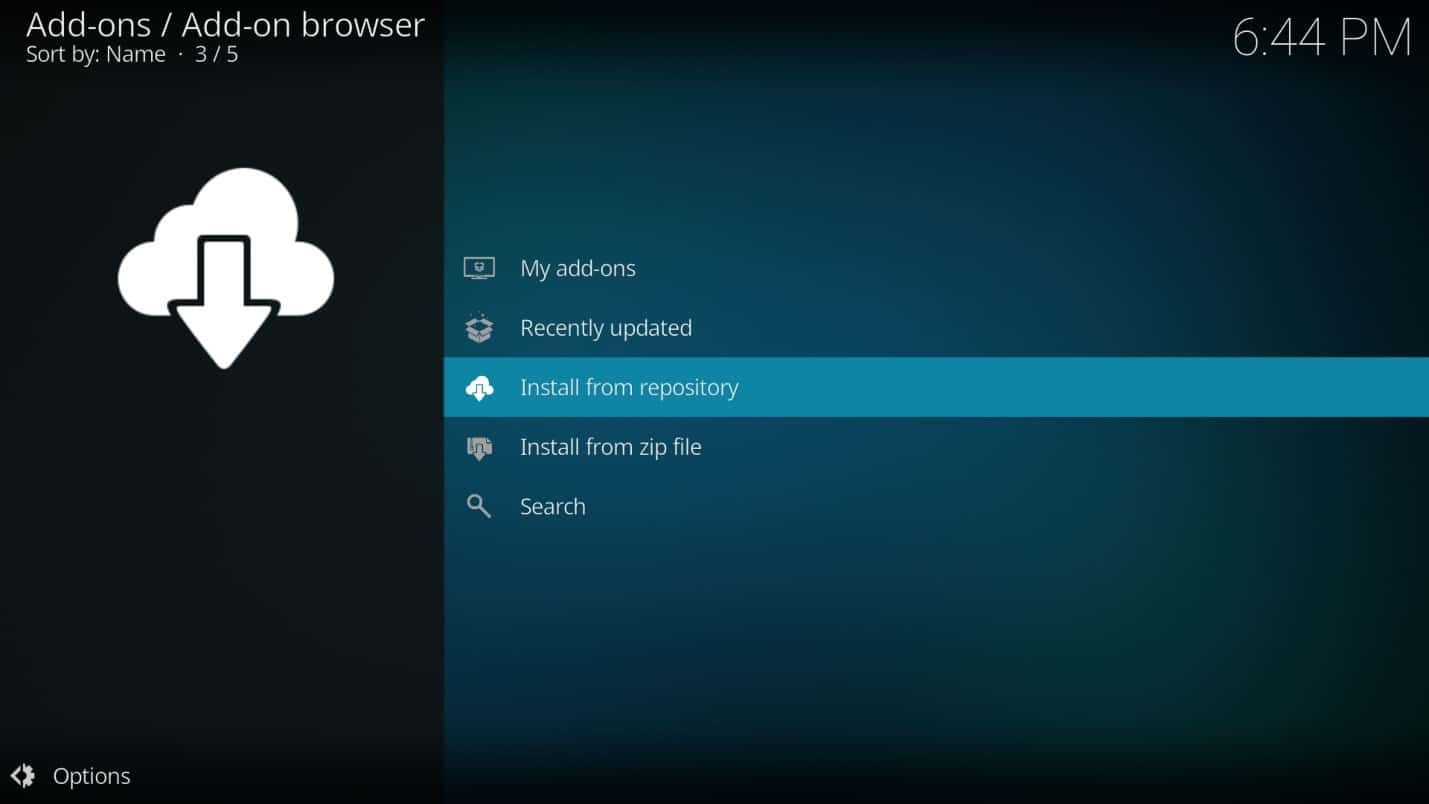
Step 3: Click on “Install from repository”.
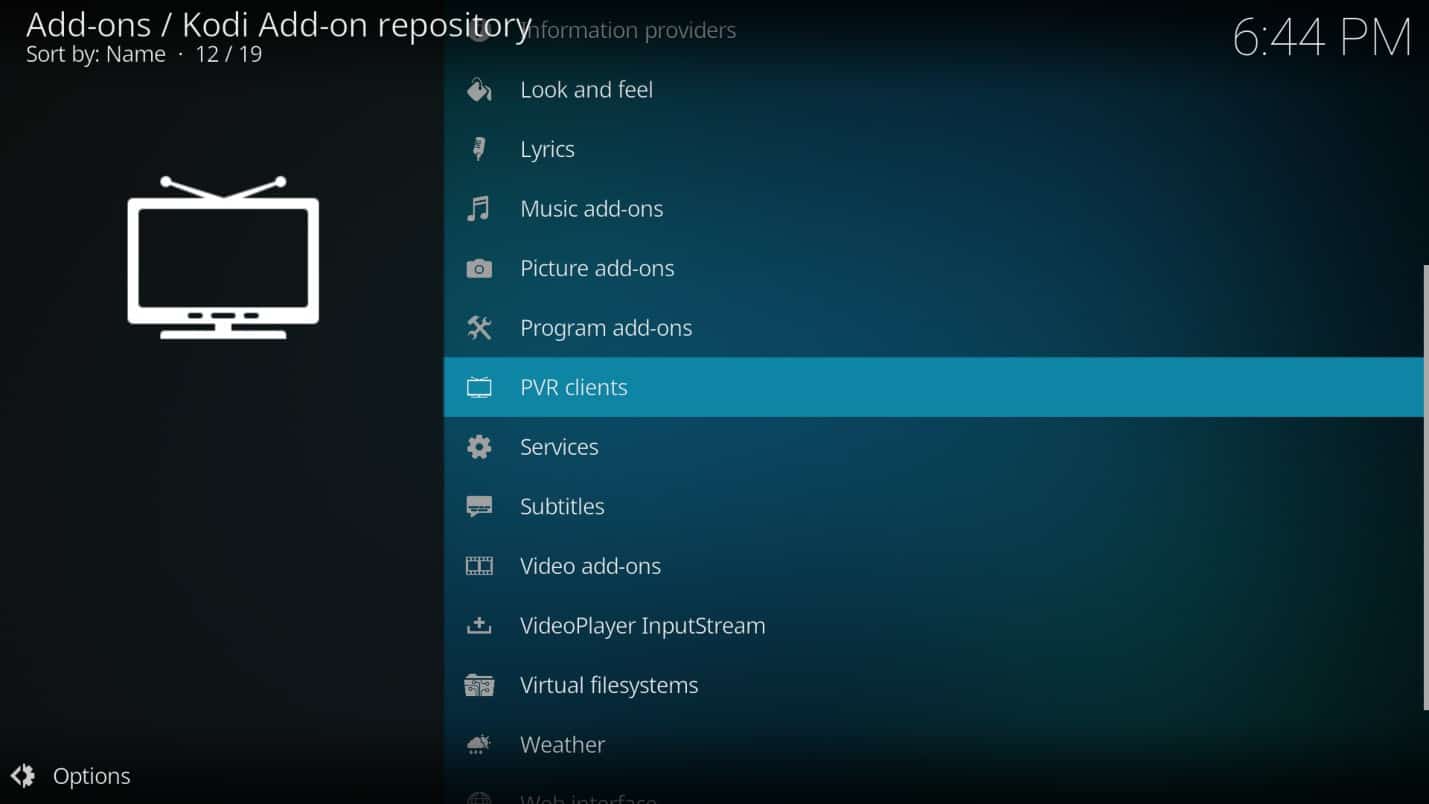
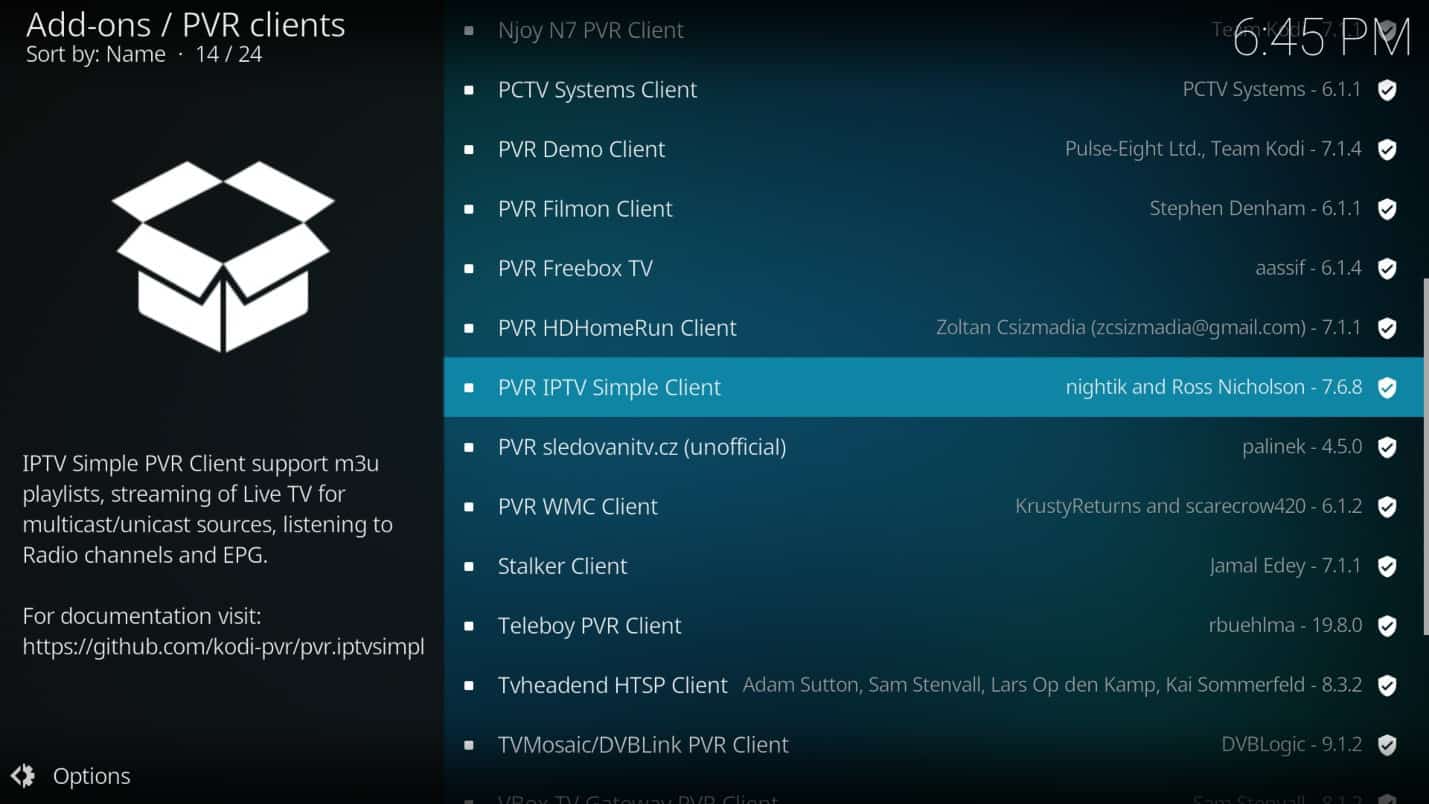
Step 4: Click on “PVR clients”.
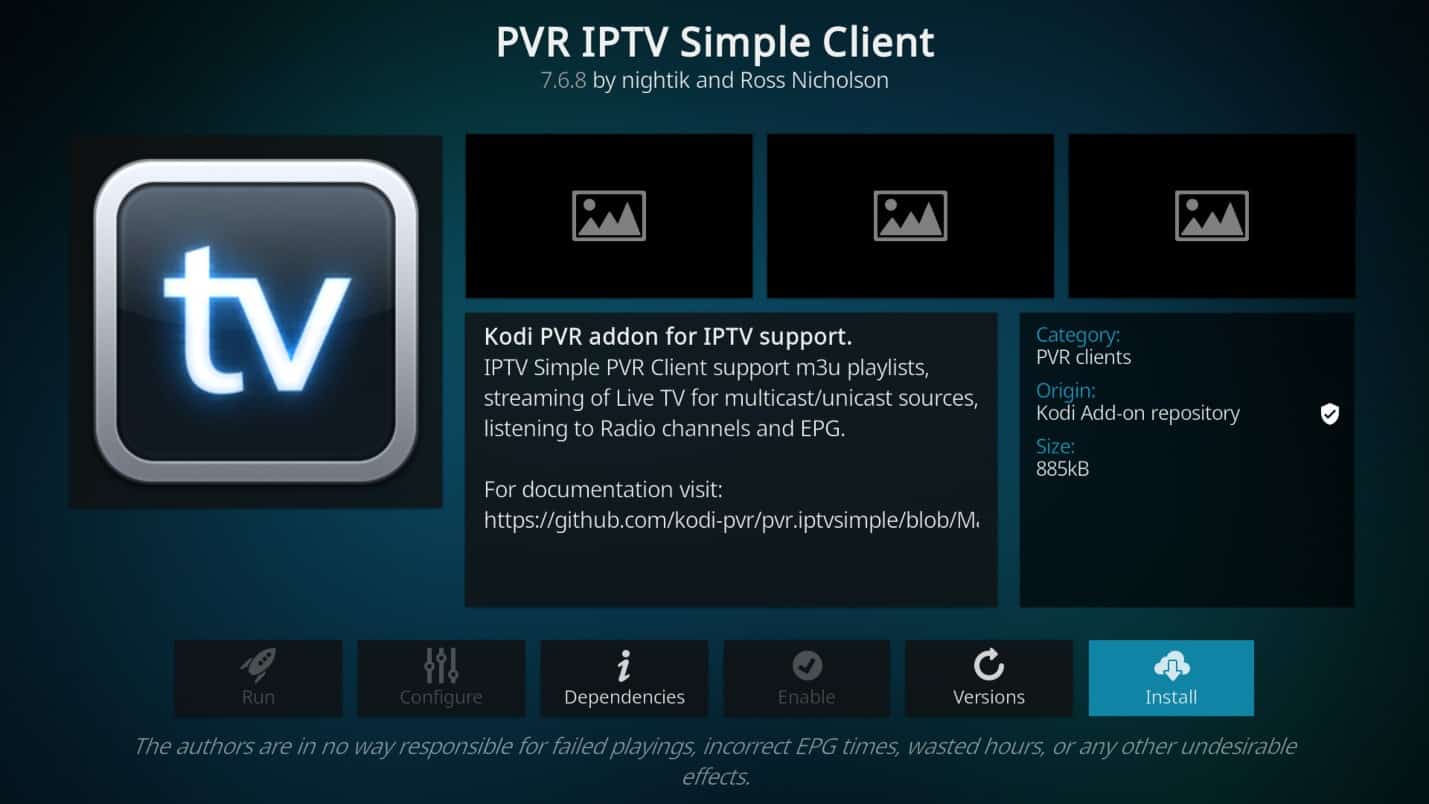
Step 5: Click on “PVR IPTV Simple Client”.
Step 6: Click on “Install”.
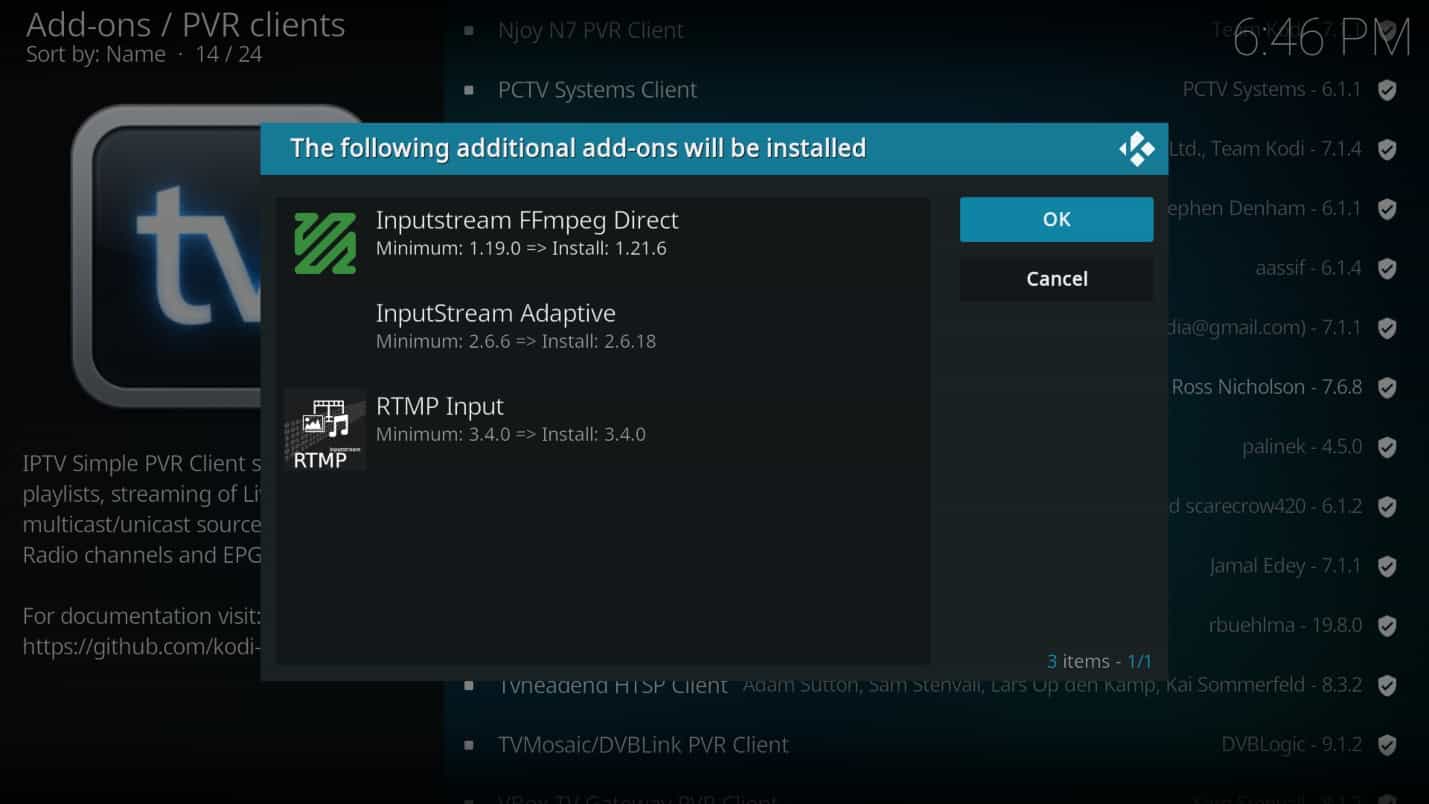
Step 7: Kodi will inform you that there are some additional add-ons that need to be installed. Click “OK”.
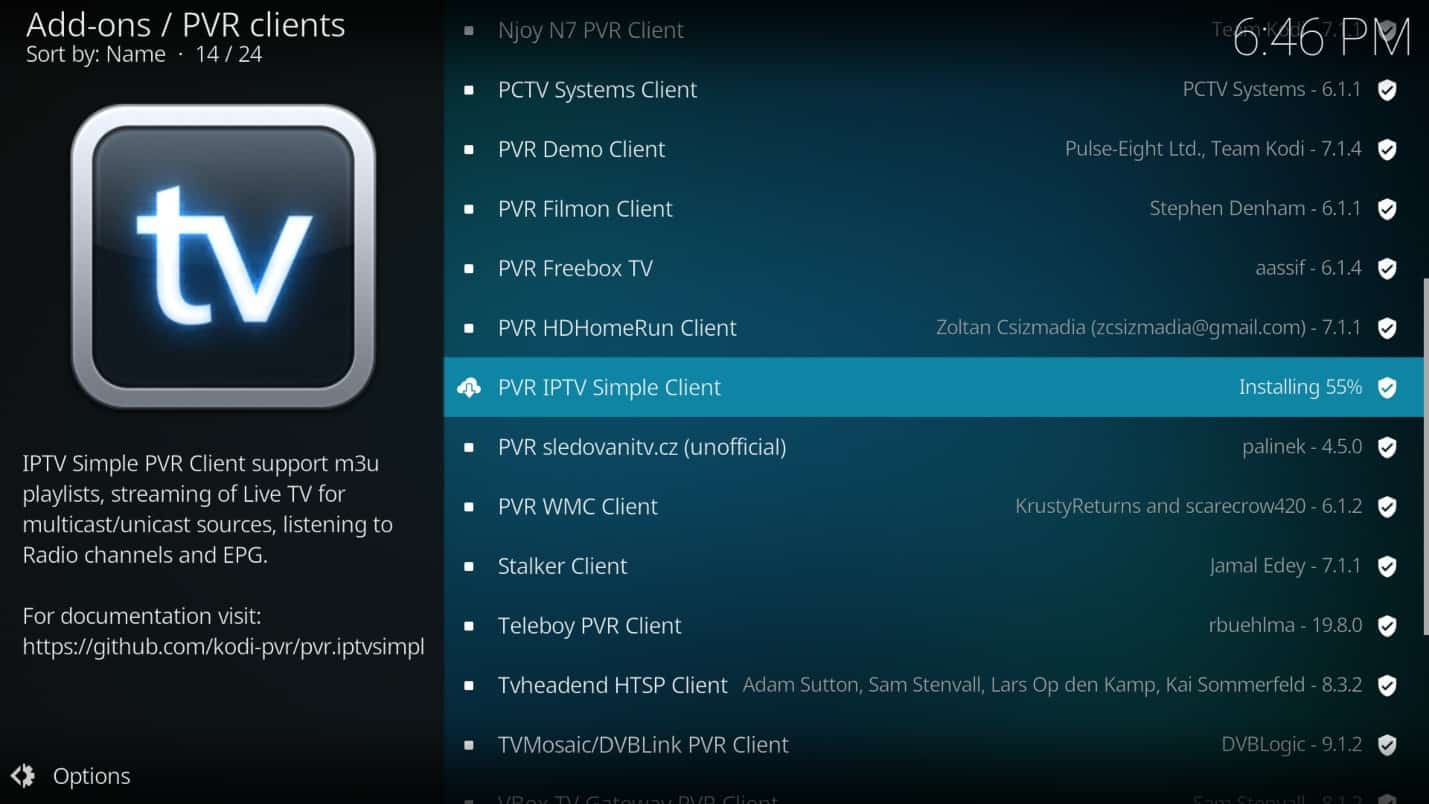
Step 8: Wait for the installation to complete.
Step 9: Once the installation is complete, you will see a notification stating that the add-on has been installed.
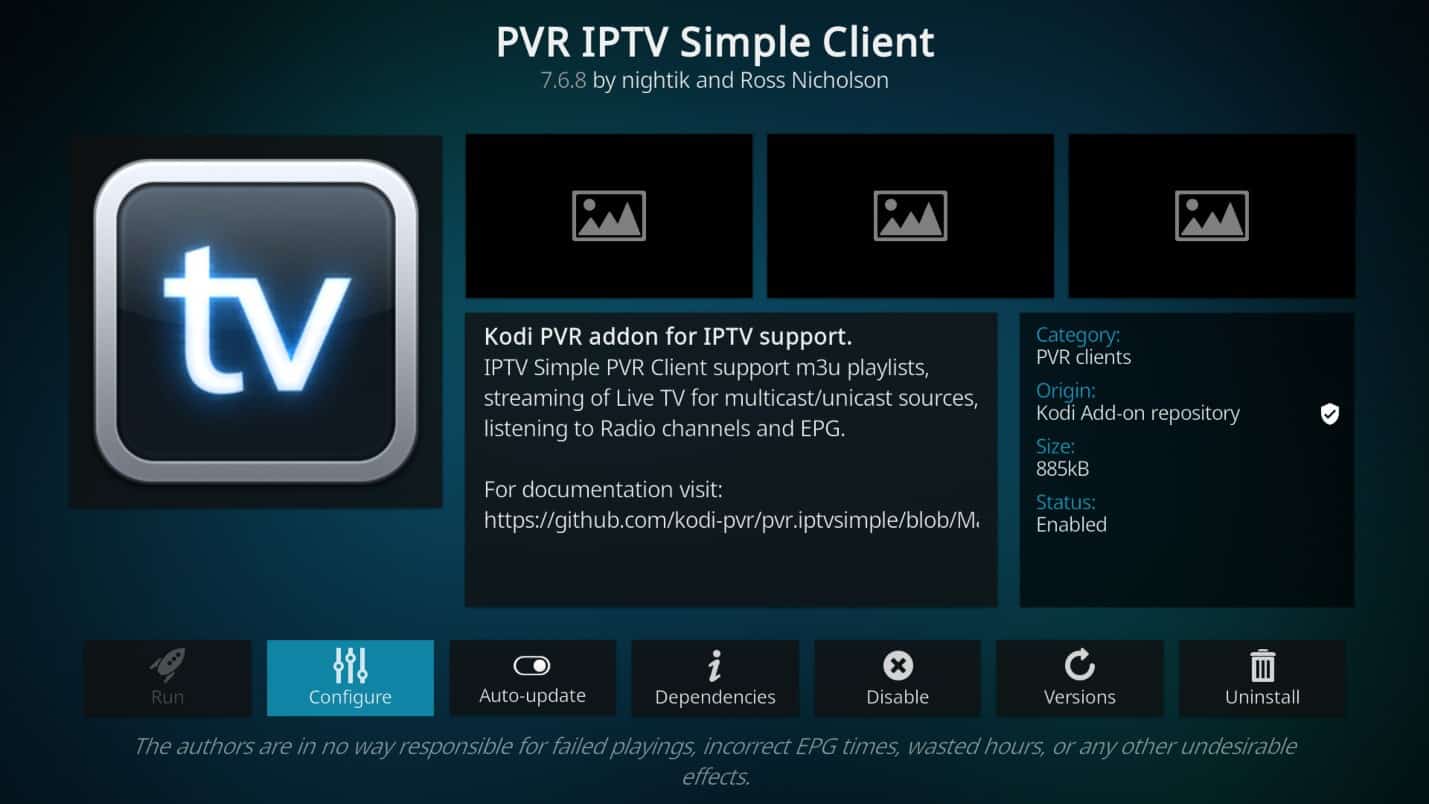
Step 10: Click on the PVR IPTV Simple Client.
Step 11: Click on “Configure”.
Step 12: Under the “general” tab, click on the M3U playlist URL.
Step 13: Input the M3U playlist from your IPTV provider, then click OK.
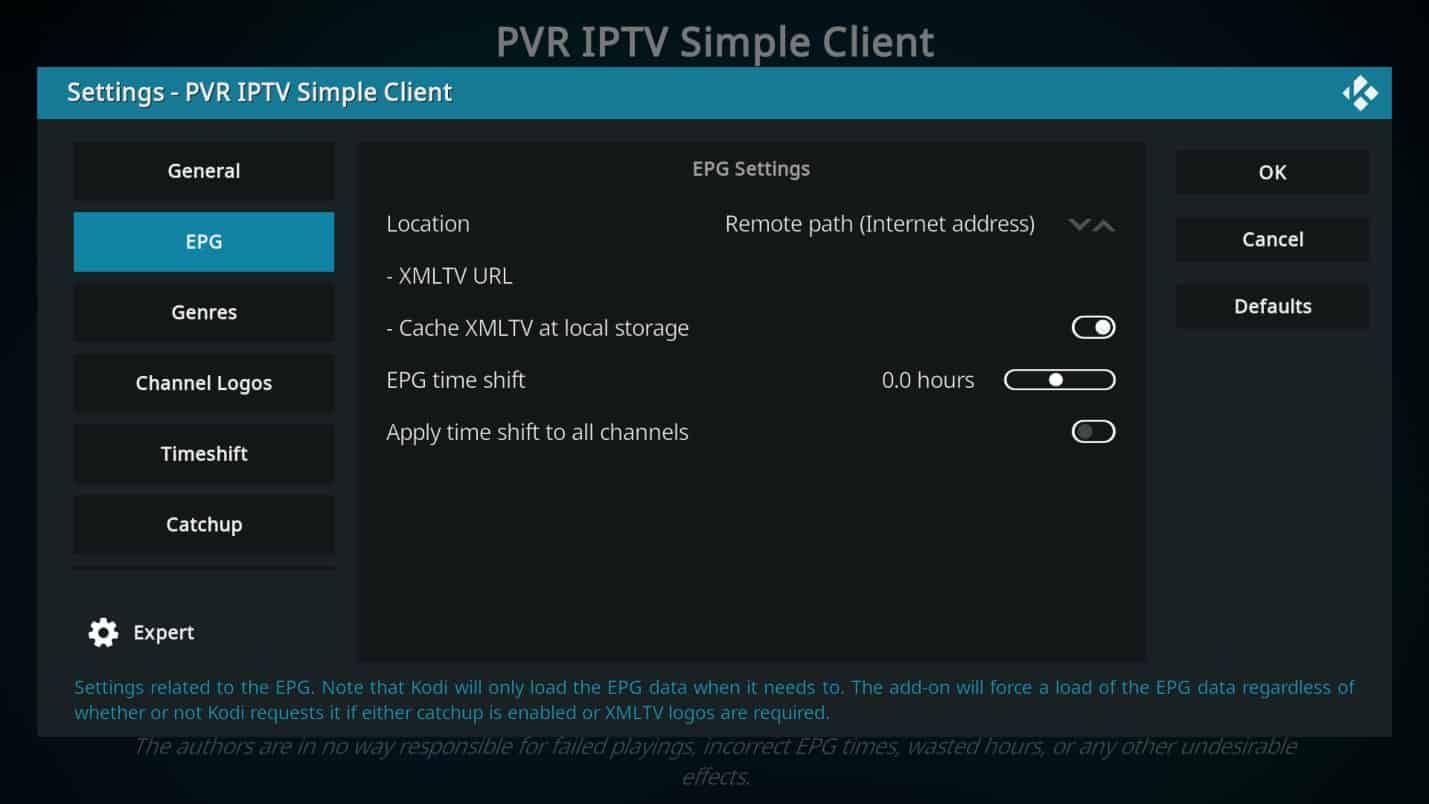
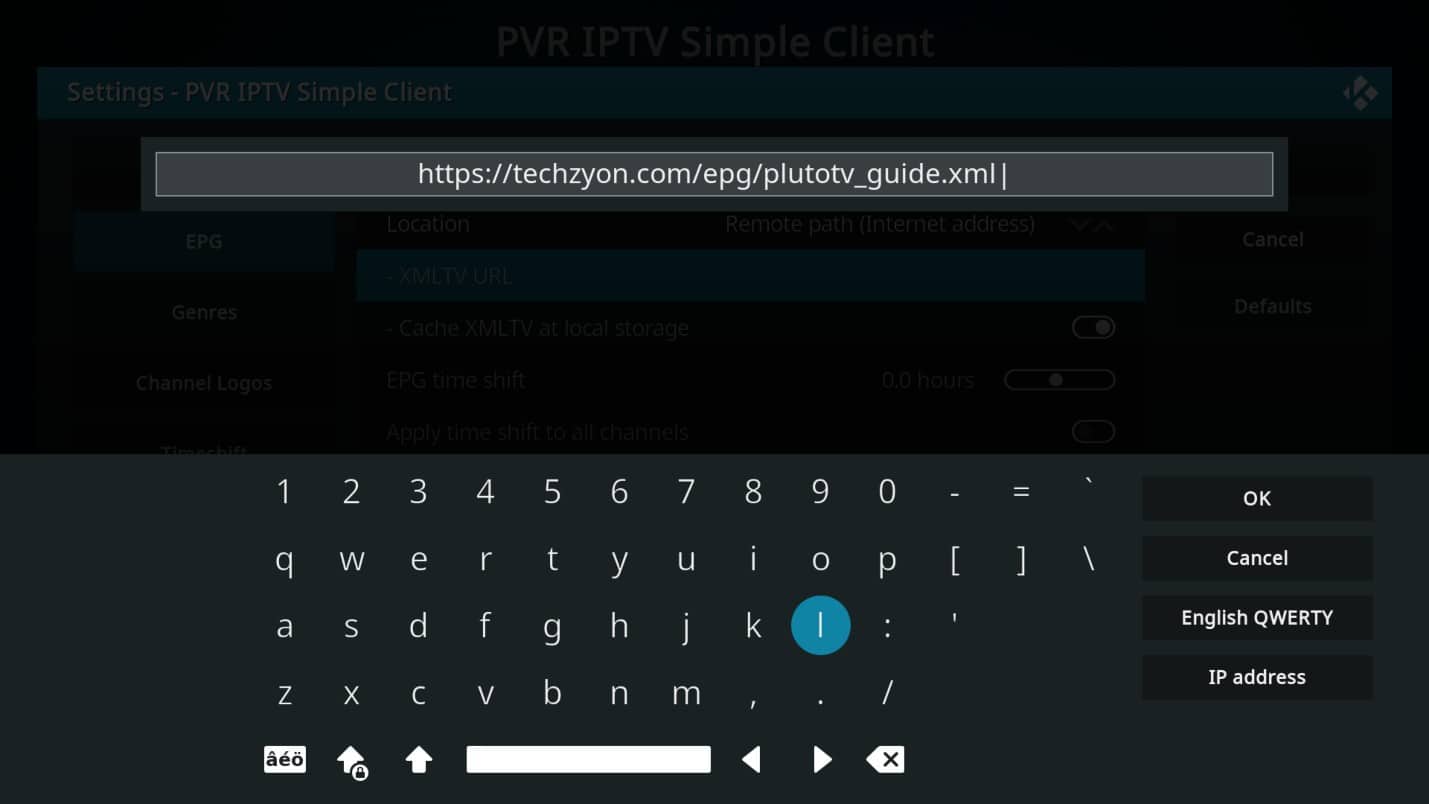
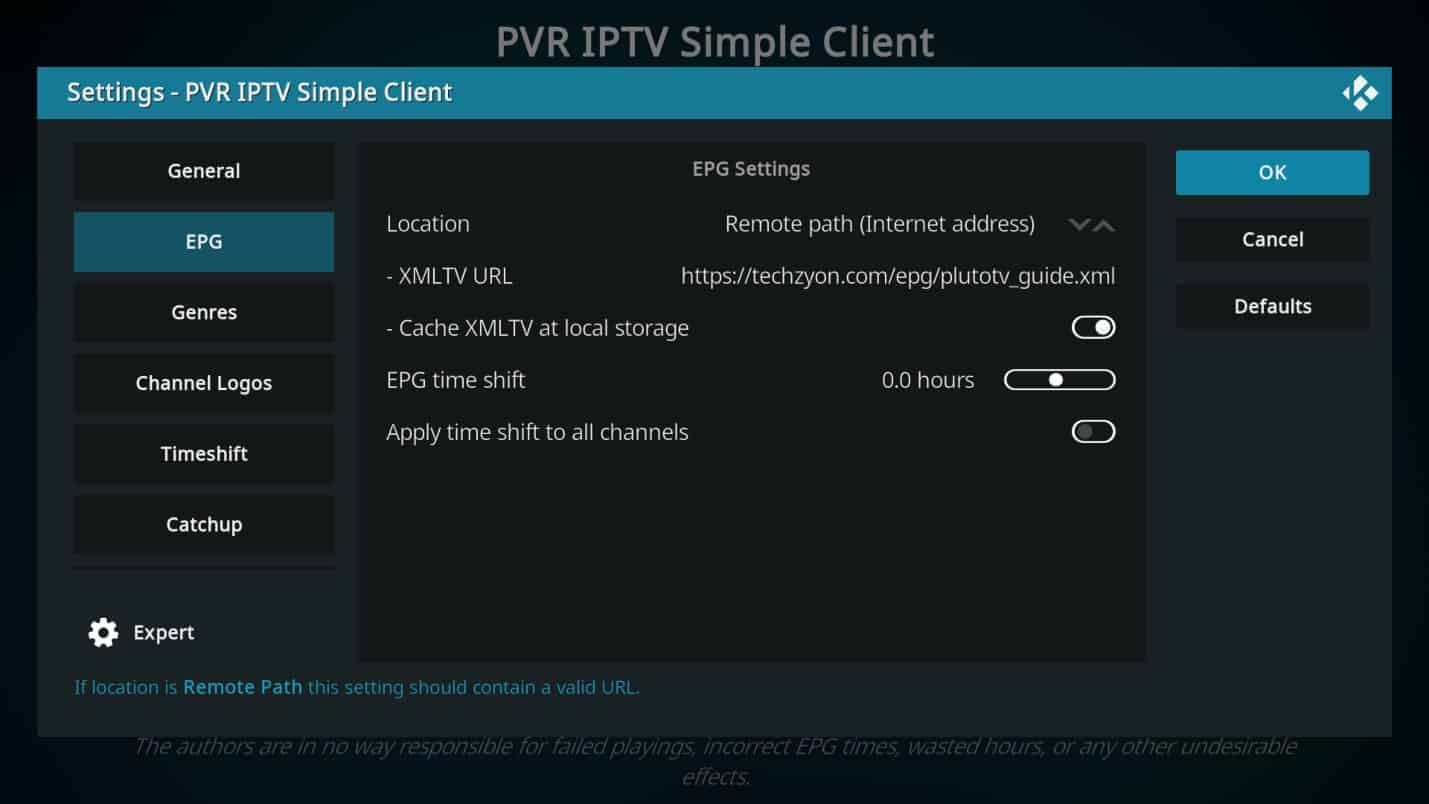
Step 14: Click on the EPG button on the left of the screen, then click on the XMLTV URL button to input your EPG (Electronic Program Guide).
Step 15: Input the EPG provided by your IPTV provider, then click OK.
Step 16: Click OK again.
Previous Kodi builds required one to restart the application, but with Kodi 19 Matrix, this is no longer necessary.
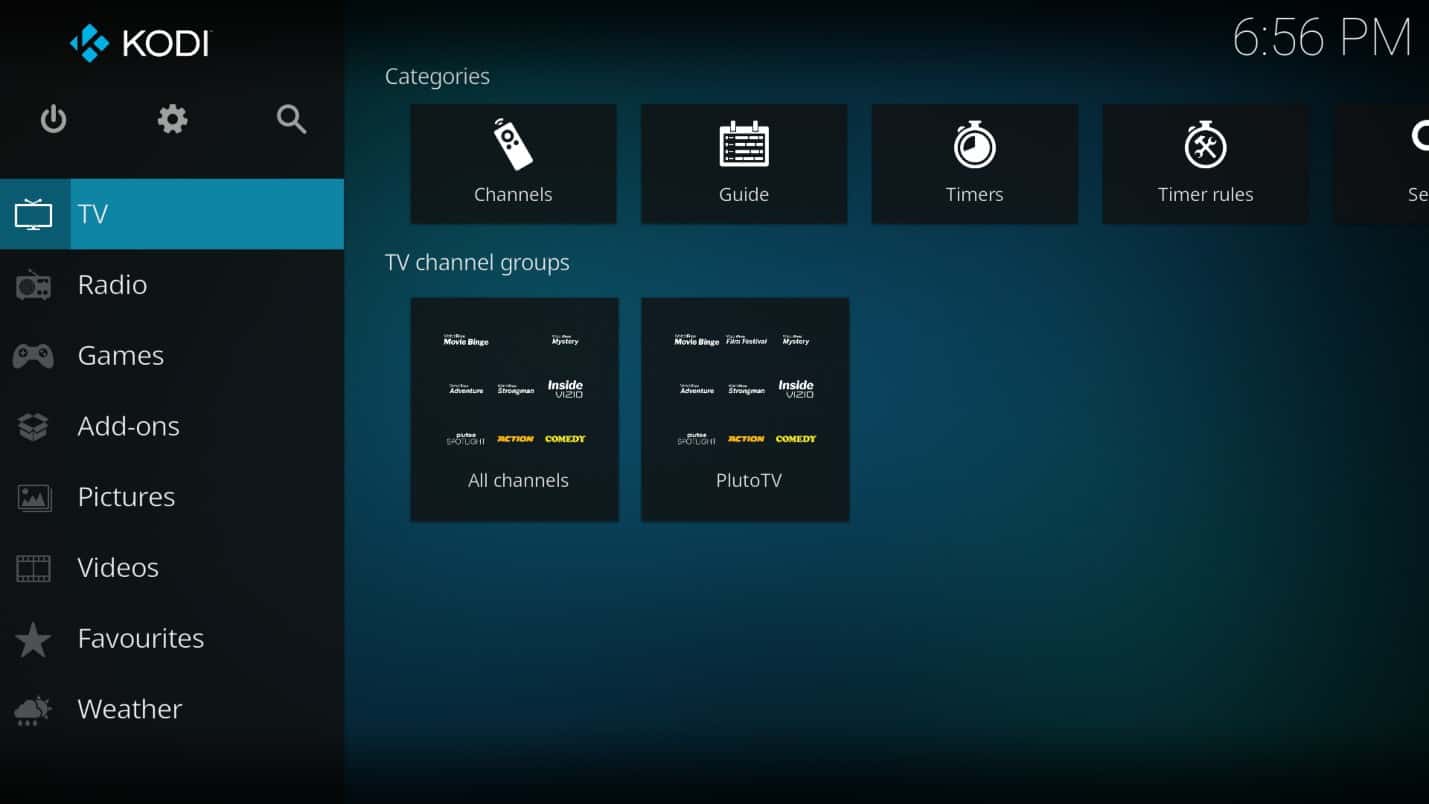
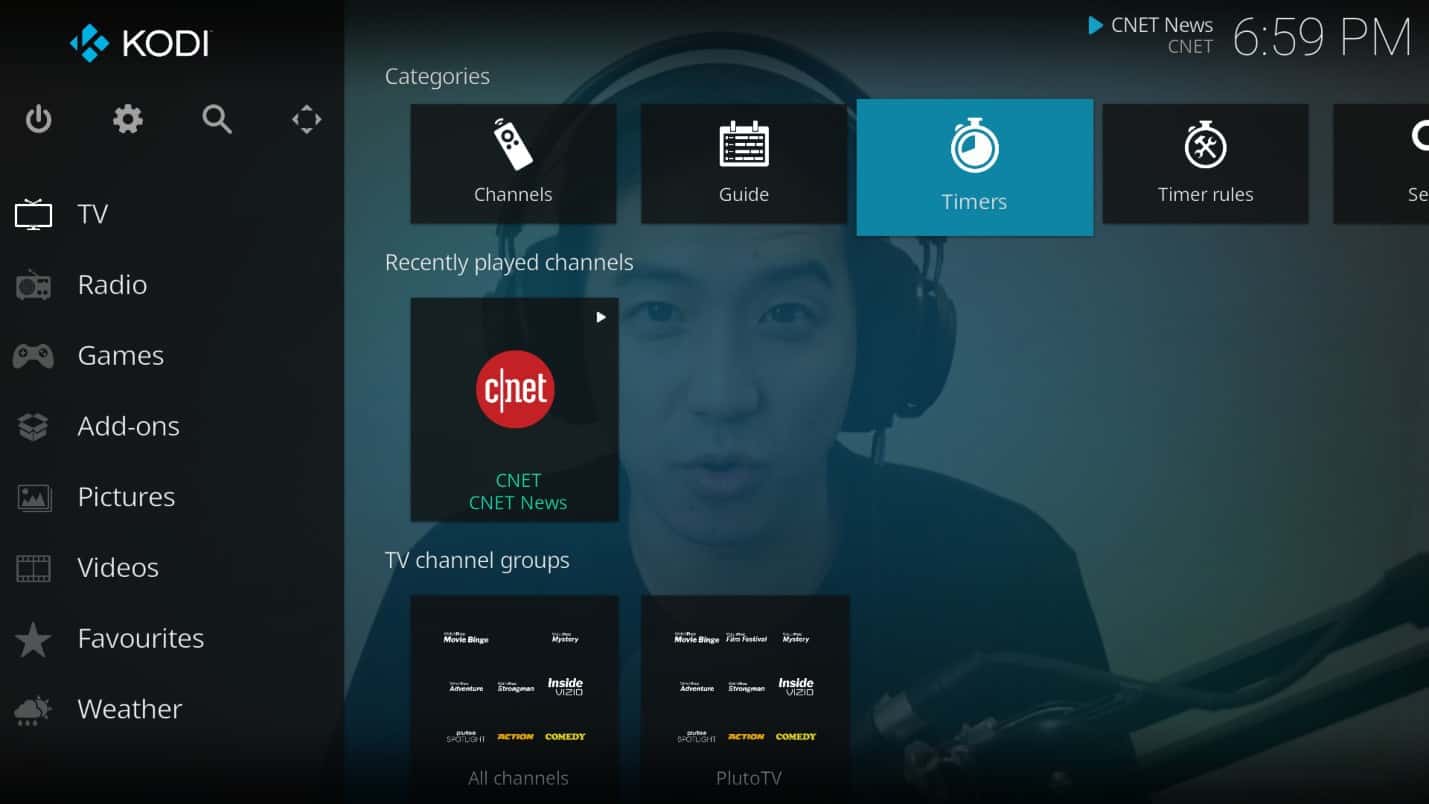
Step 17: Navigate back to the home screen and click on TV on the left menu.
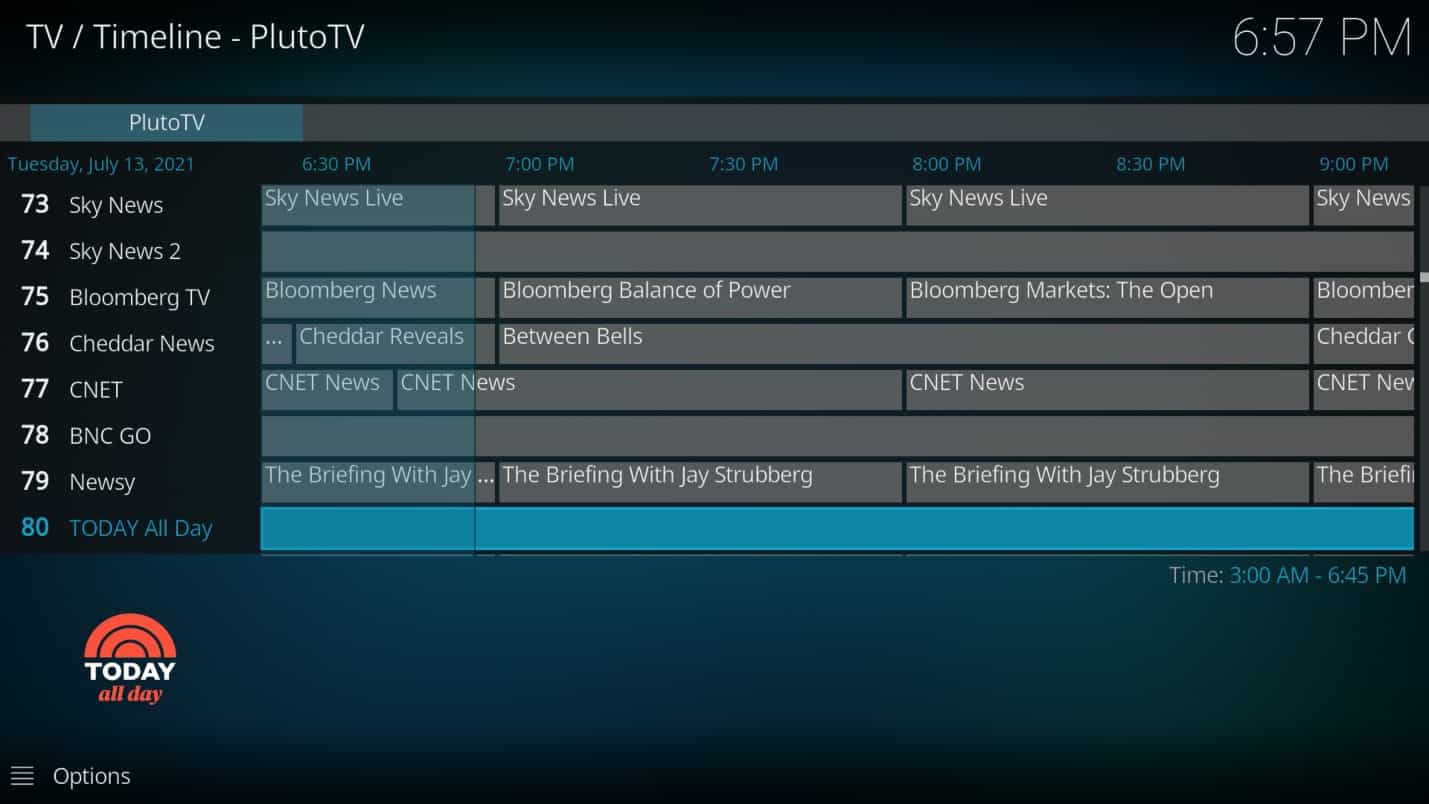
Step 18: Click on the IPTV service on the right panel to reveal the EPG.
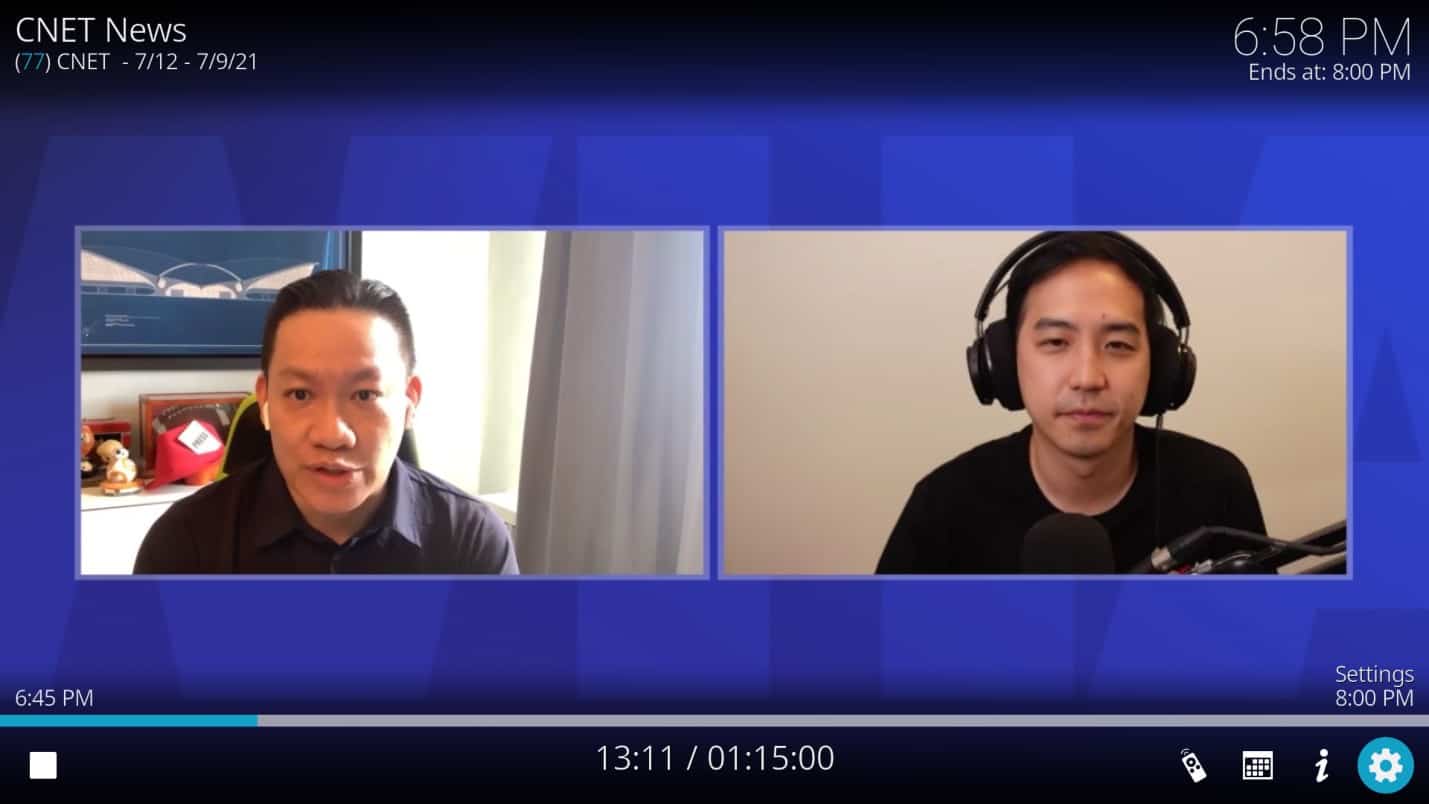
Step 19: Click on any of the channels to begin watching.
Additional Functionality
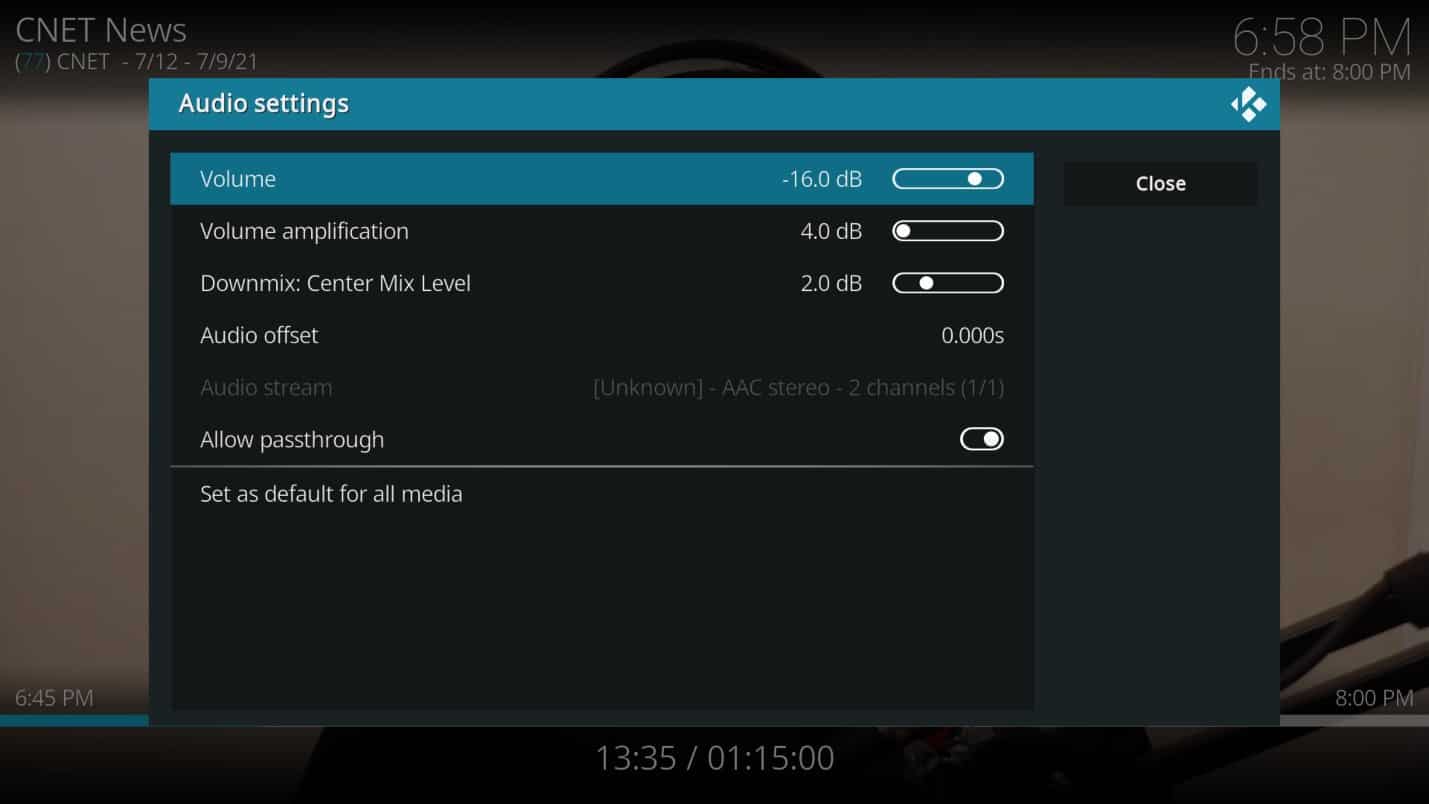
Audio, Video, Subtitle Settings: Click enter on your remote to show the bottom menu, click on settings on the bottom right.
Here you can change multiple audio and video aspects, this is where Kodi draws heavily on its support for local media.
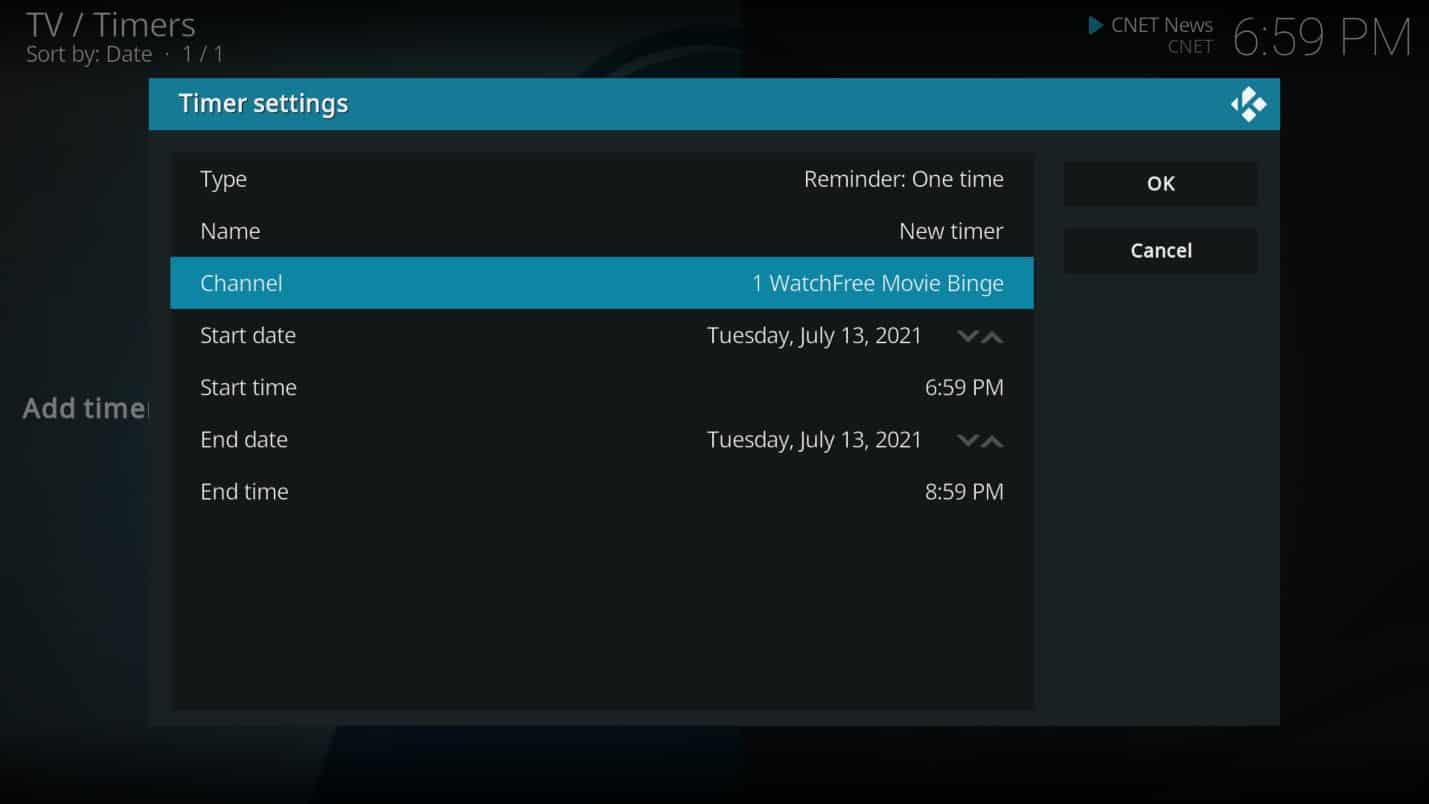
How to Set Timers on Kodi
Sometimes you may need to set a timer to remind you to tune in to a show or event, Kodi has got you covered.
Click on “Add Timer”.
Configure timer based on timing, repeat, channel, etc.
Kodi requires the additional setup of a PVR client in order to enjoy IPTV. This is however quite a straightforward matter as has been demonstrated in the tutorial above.
As always, I look forward to hearing your thoughts and comments in the comments below.
To provide the best experiences, we use technologies like cookies to store and/or access device information. Consenting to these technologies will allow us to process data such as browsing behavior or unique IDs on this site. Not consenting or withdrawing consent, may adversely affect certain features and functions.
Functional
Always active
The technical storage or access is strictly necessary for the legitimate purpose of enabling the use of a specific service explicitly requested by the subscriber or user, or for the sole purpose of carrying out the transmission of a communication over an electronic communications network.
Preferences
The technical storage or access is necessary for the legitimate purpose of storing preferences that are not requested by the subscriber or user.
Statistics
The technical storage or access that is used exclusively for statistical purposes.The technical storage or access that is used exclusively for anonymous statistical purposes. Without a subpoena, voluntary compliance on the part of your Internet Service Provider, or additional records from a third party, information stored or retrieved for this purpose alone cannot usually be used to identify you.
Marketing
The technical storage or access is required to create user profiles to send advertising, or to track the user on a website or across several websites for similar marketing purposes.
 Step 2: Search for “Kodi”
 Step 3: Click on the “Install” button.
Step 4: Once the installation has been completed, click “open” to launch the app.
Step 3: Click on the “Install” button.
Step 4: Once the installation has been completed, click “open” to launch the app.
 Step 2: Once on the “Settings” page, click on “Add-ons”.
 Step 3: Click on “Install from repository”.
 Step 4: Click on “PVR clients”.
 Step 5: Click on “PVR IPTV Simple Client”.
 Step 6: Click on “Install”.
 Step 7: Kodi will inform you that there are some additional add-ons that need to be installed. Click “OK”.
 Step 8: Wait for the installation to complete.
 Step 9: Once the installation is complete, you will see a notification stating that the add-on has been installed.
 Step 10: Click on the PVR IPTV Simple Client.
Step 11: Click on “Configure”.
Step 10: Click on the PVR IPTV Simple Client.
Step 11: Click on “Configure”.
 Step 12: Under the “general” tab, click on the M3U playlist URL.
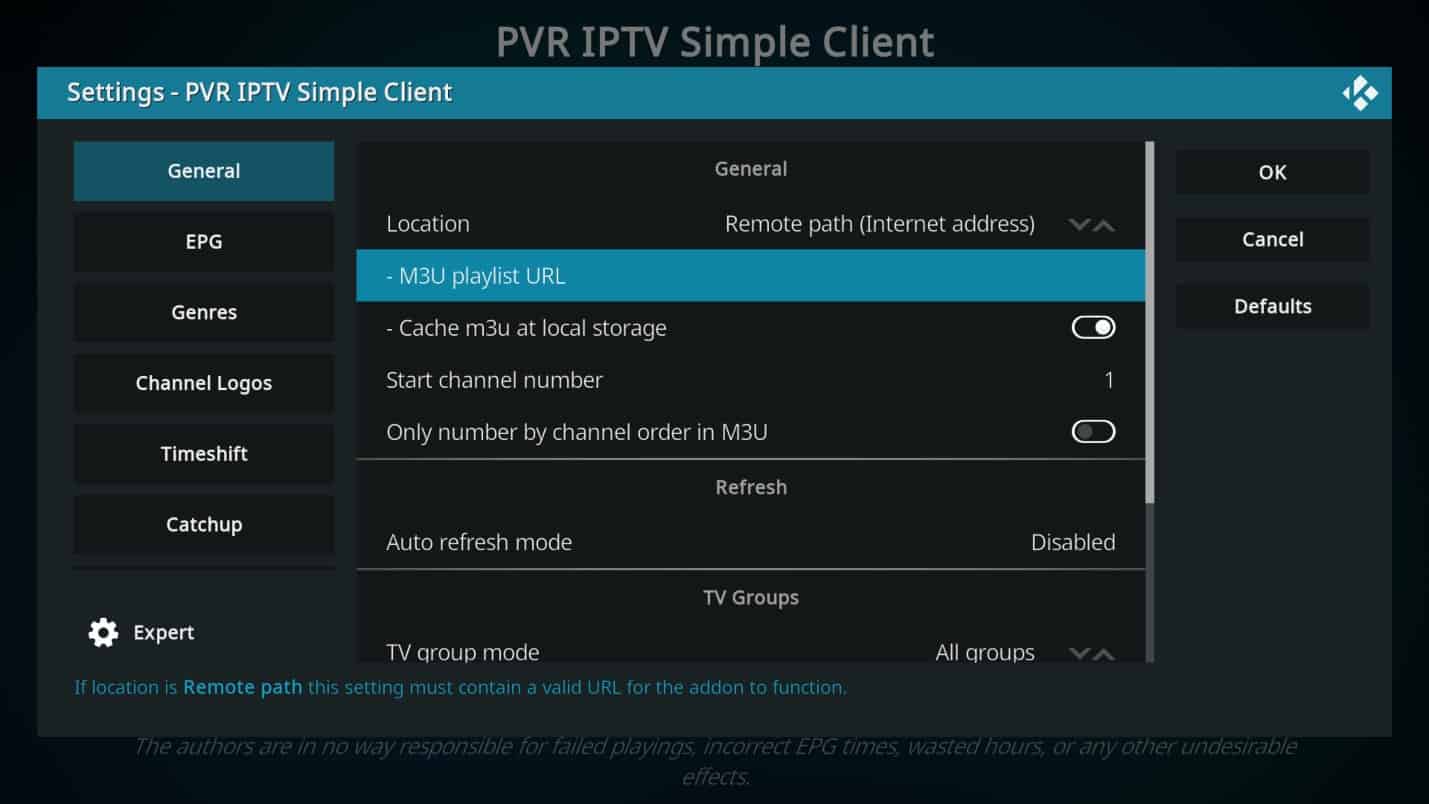 Step 13: Input the M3U playlist from your IPTV provider, then click OK.
 Step 16: Click OK again.
Previous Kodi builds required one to restart the application, but with Kodi 19 Matrix, this is no longer necessary.
Step 16: Click OK again.
Previous Kodi builds required one to restart the application, but with Kodi 19 Matrix, this is no longer necessary.
 Step 17: Navigate back to the home screen and click on TV on the left menu.
 Step 18: Click on the IPTV service on the right panel to reveal the EPG.
 Step 19: Click on any of the channels to begin watching.
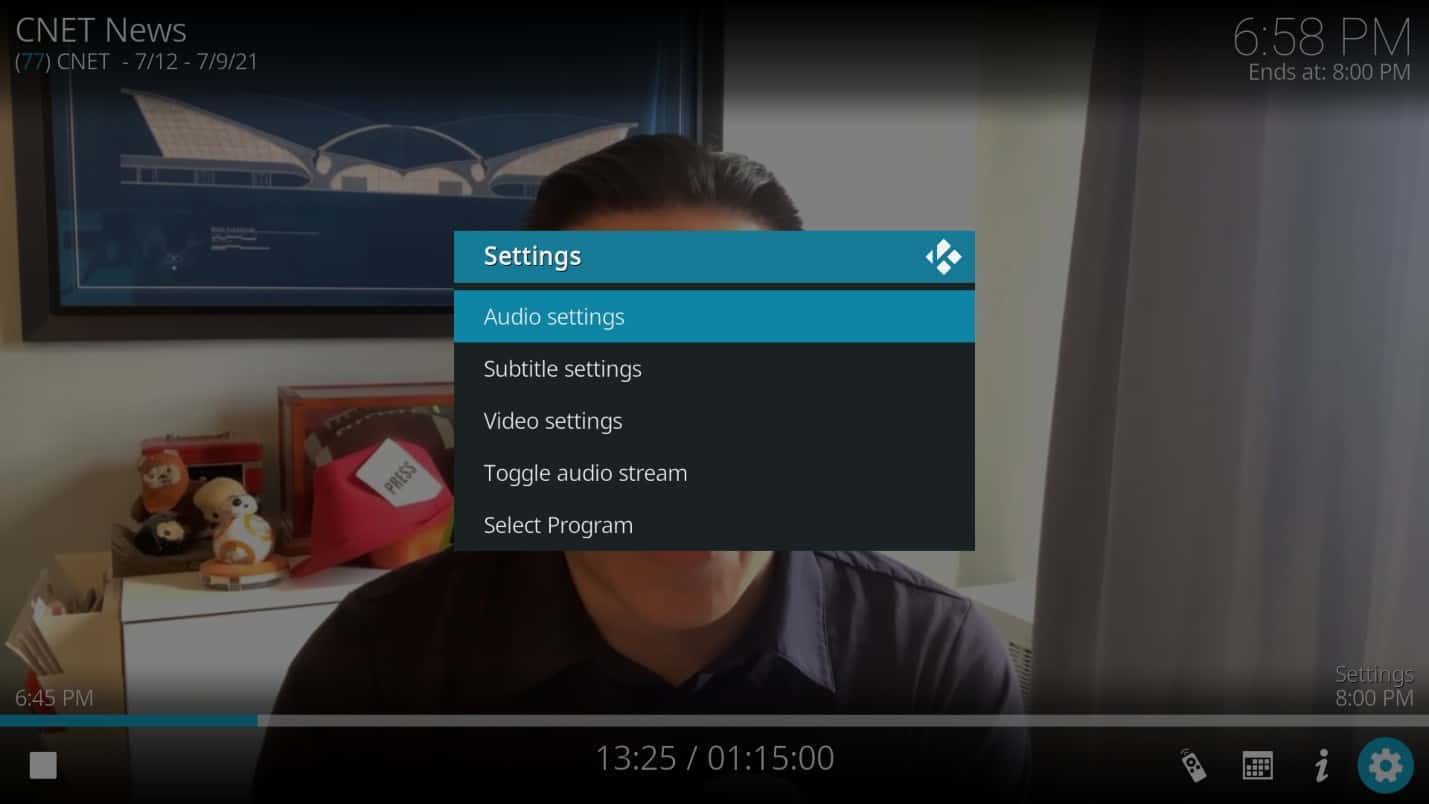 Here you can change multiple audio and video aspects, this is where Kodi draws heavily on its support for local media.
 Click on “Add Timer”.
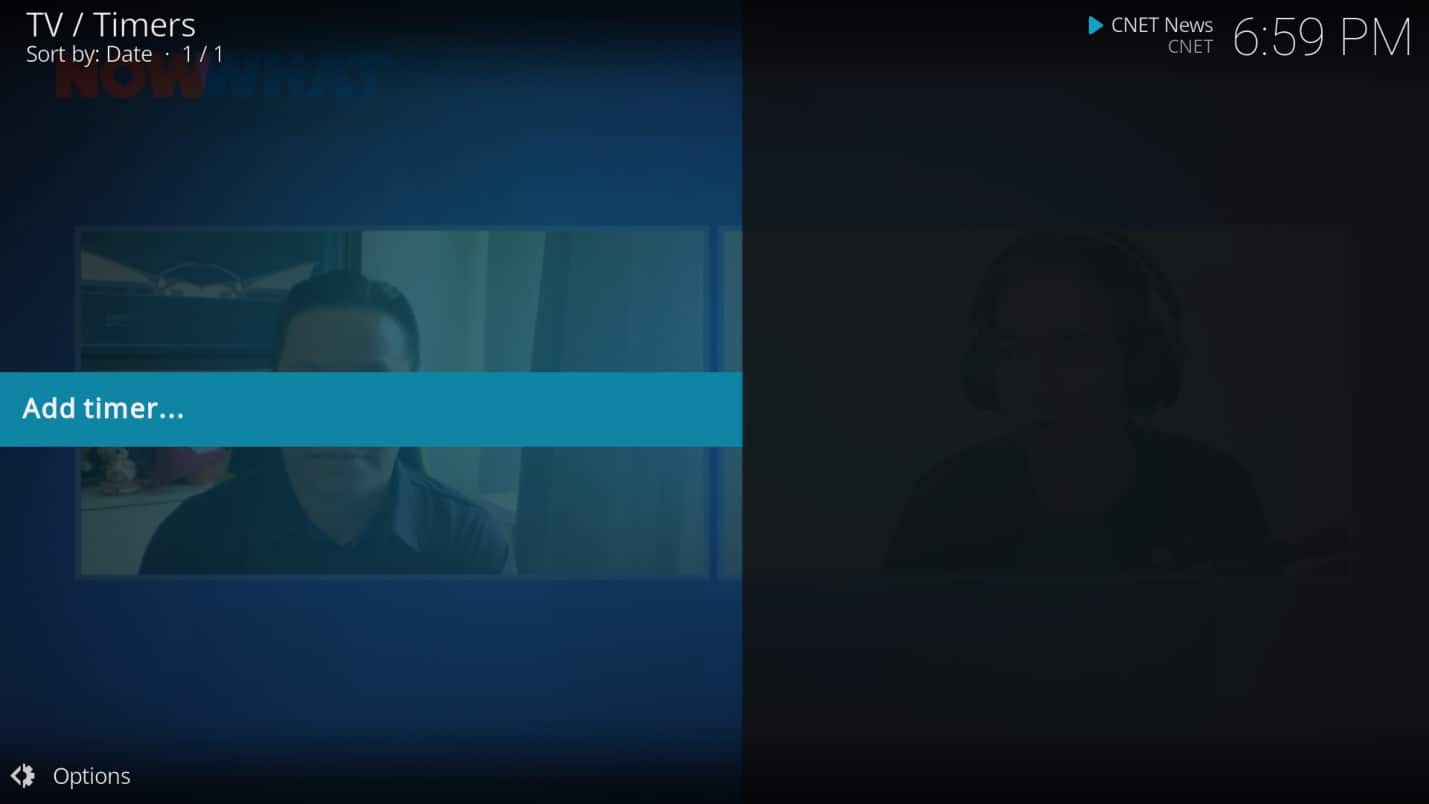 Configure timer based on timing, repeat, channel, etc.
 Kodi requires the additional setup of a PVR client in order to enjoy IPTV. This is however quite a straightforward matter as has been demonstrated in the tutorial above.
As always, I look forward to hearing your thoughts and comments in the comments below.
Kodi requires the additional setup of a PVR client in order to enjoy IPTV. This is however quite a straightforward matter as has been demonstrated in the tutorial above.
As always, I look forward to hearing your thoughts and comments in the comments below.

